
Because crispy skin is the best part.
My favourite thing about chicken is its skin. Biting into that golden, shattering crunch that gives way to juicy, tender meat is one of my earliest and favourite food memories. Sunday roast, anyone? However, perfecting crispy skin can feel like chasing a myth sometimes: too often we end up with limp, chewy skin or overcooked chicken.
The good news? Achieving crisp perfection isn’t about luck, crumb, or deep-frying; it’s about using the right technique. Follow these four simple rules and you’ll have guaranteed crackling skin, every time.
Four easy steps for crispy-skinned chicken, guaranteed
1. Pat down
Dry skin equals crispy skin. Pat every bit of the chicken with a paper towel (or air dry for a few hours in the fridge) before cooking.
Moisture is the sworn enemy of anything aspiring to crisp in the kitchen. To give your chicken (whether a whole bird or portioned) the best chance of crisping up, you’ll need to pat it down thoroughly. To get the skin crisping up, it needs the best foundation to start, which is undoubtedly a dry one.
If the skin starts out as soggy, it will take ages for the moisture to evaporate; by then, the meat underneath will undoubtedly be dry.
2. Fat is your best friend
Fat has the most magical ability to change the texture of foods from soggy and sad to addictive and crisp.
Right before you start cooking, rub the skin with a tablespoon or so of your favourite fat source: olive oil, canola oil, peanut oil, butter, or even duck fat. My personal favourite is a combination of butter and olive oil. The butter brings a welcome savoury flavour, while the olive oil’s high smoking point helps to keep the butter from burning.
If you’re dealing with a whole bird for a roast, get your hands dirty. Massage your choice of fat all over the bird, in all the crevices, and if you’d like to take it further, under the skin of the breasts.
3. Don’t forget the salt
After greasing up the skin, generously salt it.
Salt not only enhances and develops the natural flavours of an ingredient, but also draws out moisture. Your pat-down or air-dry can only dry out the skin so much. However, salt is the hero.
Whether table salt or flaky sea salt, a generous sprinkling will ensure any moisture left is drawn out early in the cooking time. This means ample time for the heat to evaporate this moisture, and hone in on crisping up the skin. If you don’t salt the outside of the chicken, the moisture may take longer to surface, all while evaporating unevenly during cooking, leaving no time for sufficient crisping.
4. Leave it be
The hardest step? Leaving it alone. Resist the urge to prod, poke, or peek; this is where the magic happens.
The best things in life are simple. This is the same for the kitchen. You’ve put in a good amount of hard work already, what with taking the time to dry the skin thoroughly, greasing it up, and seasoning it sufficiently. Now is your time to rest, and the heat’s time to shine.
If you’re roasting a whole bird, pop it into a hot oven for at least 20 minutes without interference. After 20 minutes, the skin should already start to crisp and colour. Turn the heat down to a medium-to-hot temperature to prevent burning, but maintain further crisping.
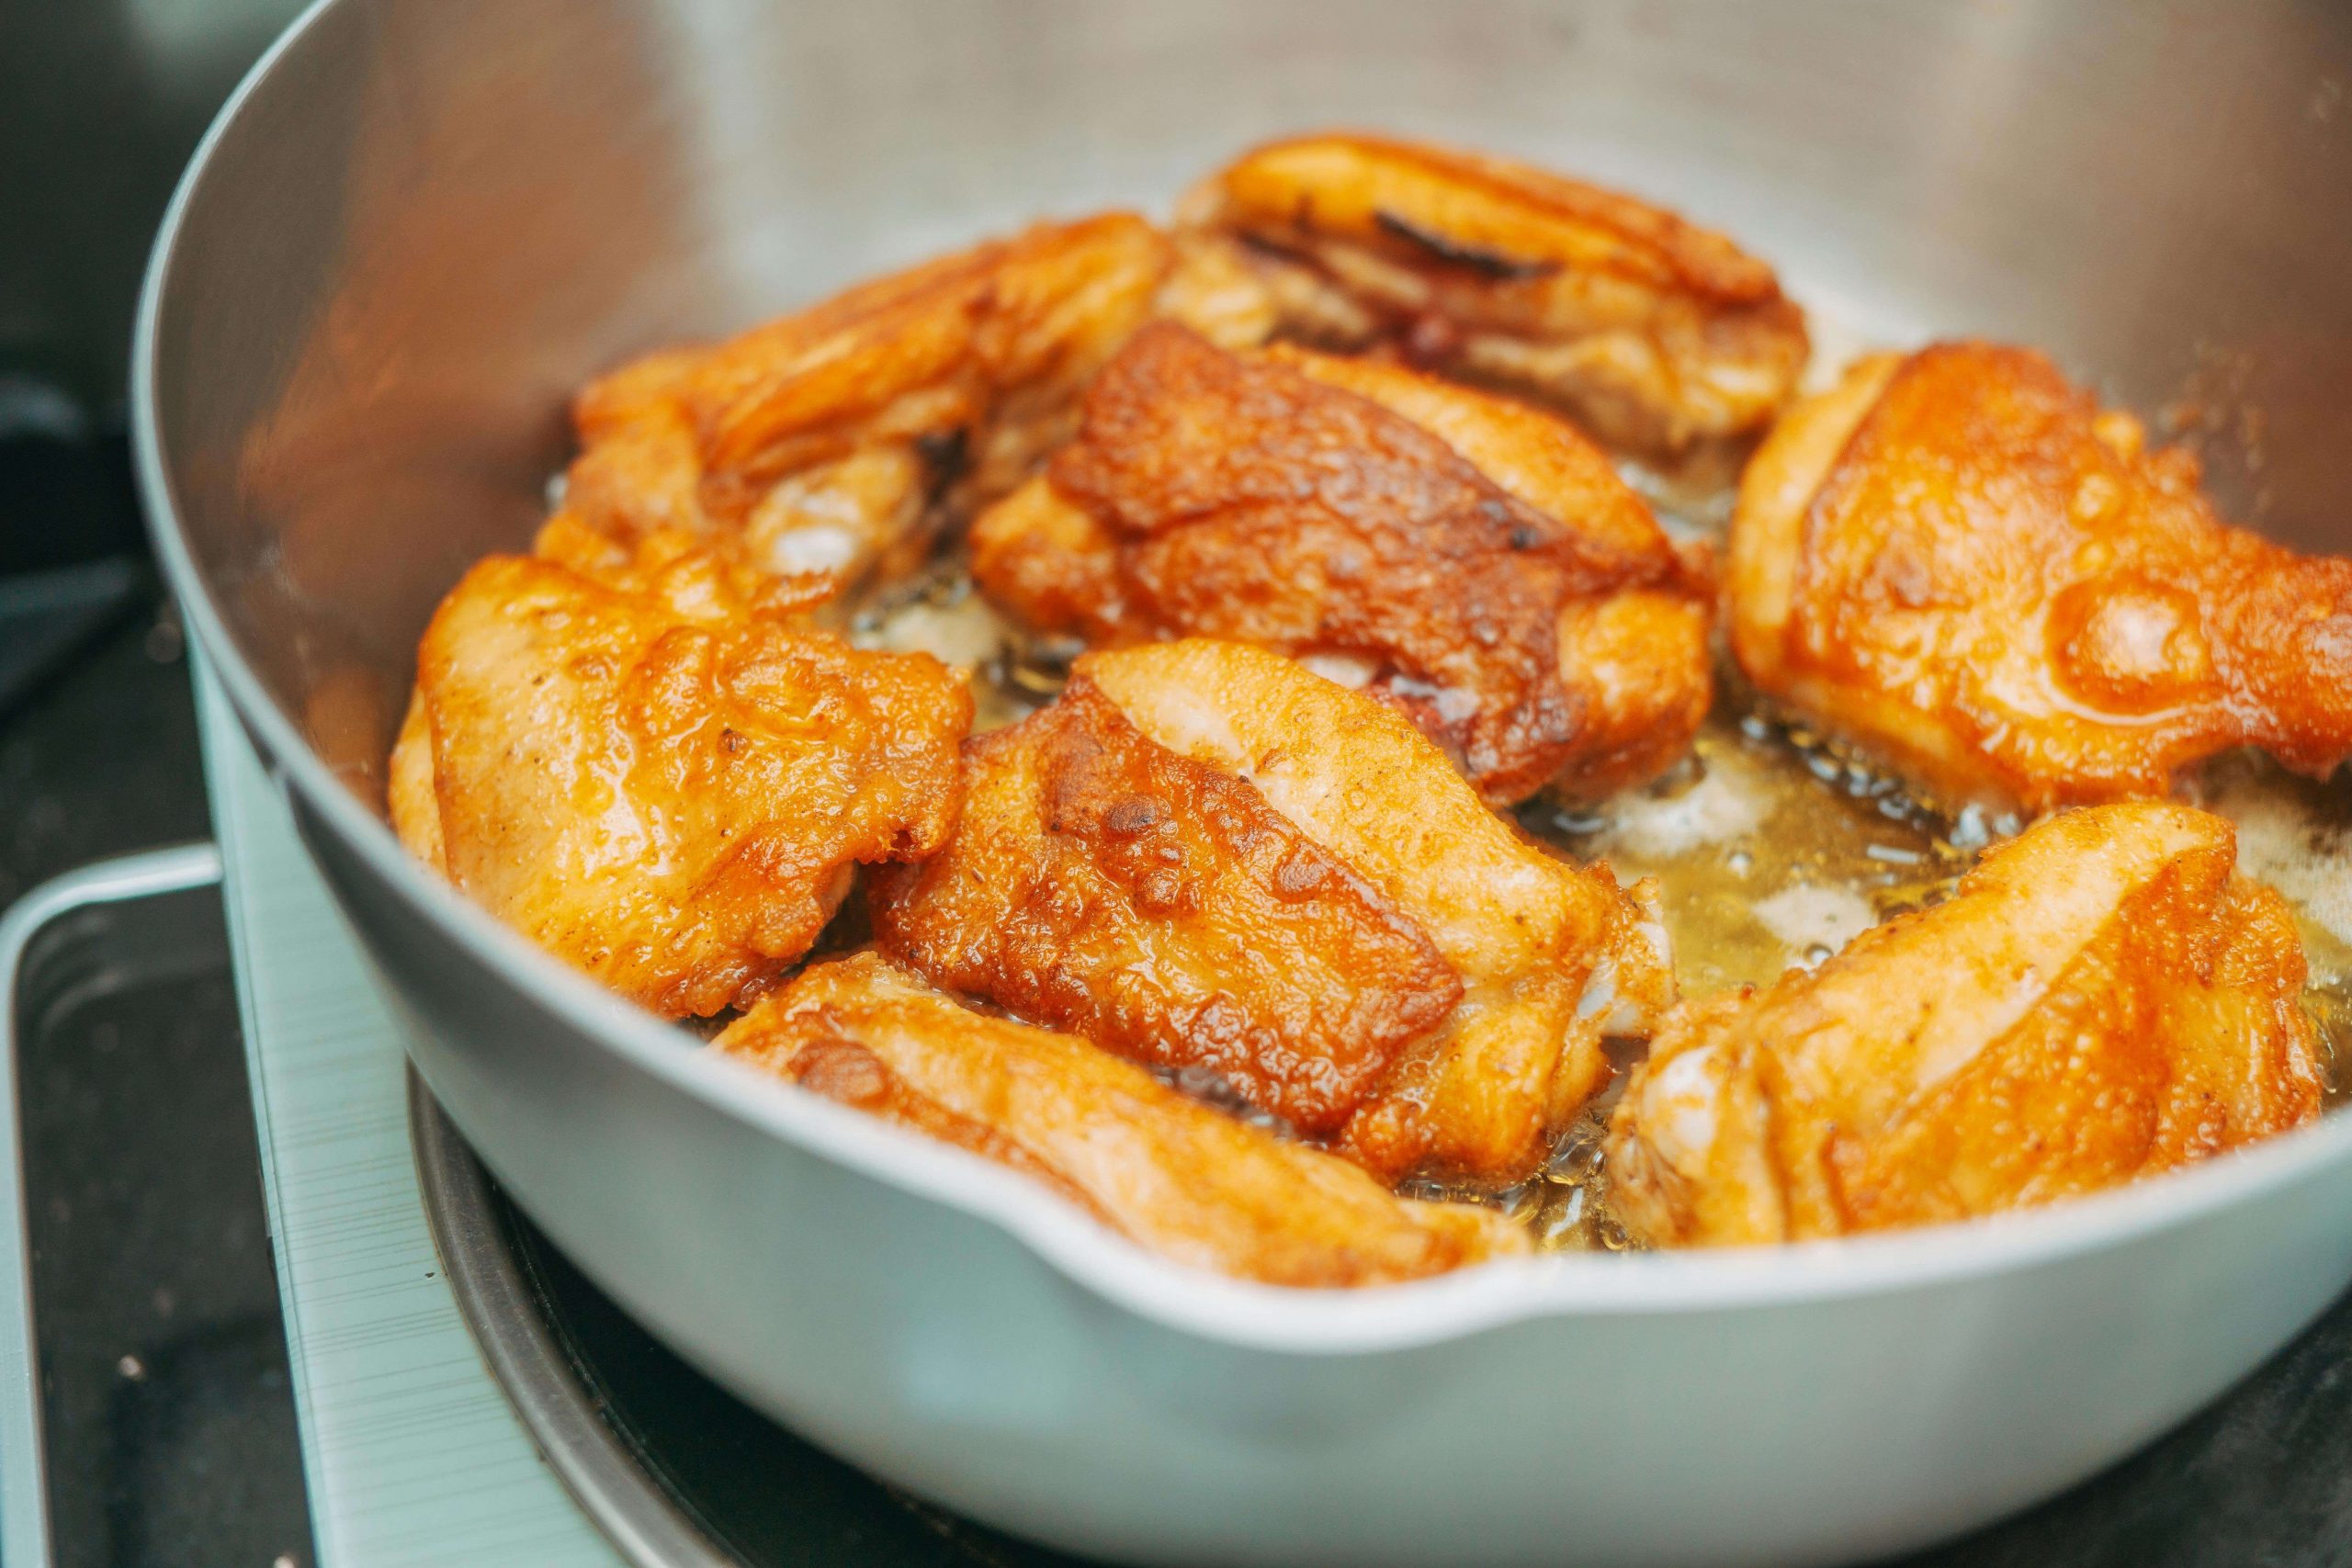
If you’re working with portions, you can roast them in the oven in the same way. If you’re pan-frying them, heat your pan on high heat. Add a good glug of oil (one with a high smoking point), and add the portions, skin-side-down, to the oil when it’s visibly thin and about to smoke. Fry skin-side down for at least 3 to 4 minutes, untouched. If you start poking and prodding beforehand, you run the risk of tearing or breaking the skin, releasing more moisture and creating an uneven surface.
A few bonus tips
Once you’ve nailed the four-step method, you can start layering on a few chef- and grandma-approved techniques to take your crispy chicken game even further:
- Baking powder magic: After drying it out, dust it lightly with baking powder and leave the chicken uncovered in the fridge for a few hours (or overnight). This helps break down the proteins in the skin for even more crunch.
- Baste for flavour: Midway through cooking, use the pan’s lucious juices to baste the skin. You’ll deepen the savoury flavour while encouraging an even, golden colour.
- Pull the skin tight: For portioned pieces, gently stretch the skin so it lies taut over the meat. Secure it with a toothpick if needed. A smooth surface crisps up more evenly than a loose, wrinkled one.
Achieving crispy skin isn’t complicated. Just the result of a few mindful steps and a little patience. Dry it well, give it a generous helping of fat and salt, then leave it alone to do its thing. Once you master these basics, you can start playing with bonus tricks like baking powder or basting with pan juices. The reward? Chicken that looks, smells, and tastes like it belongs in a restaurant.
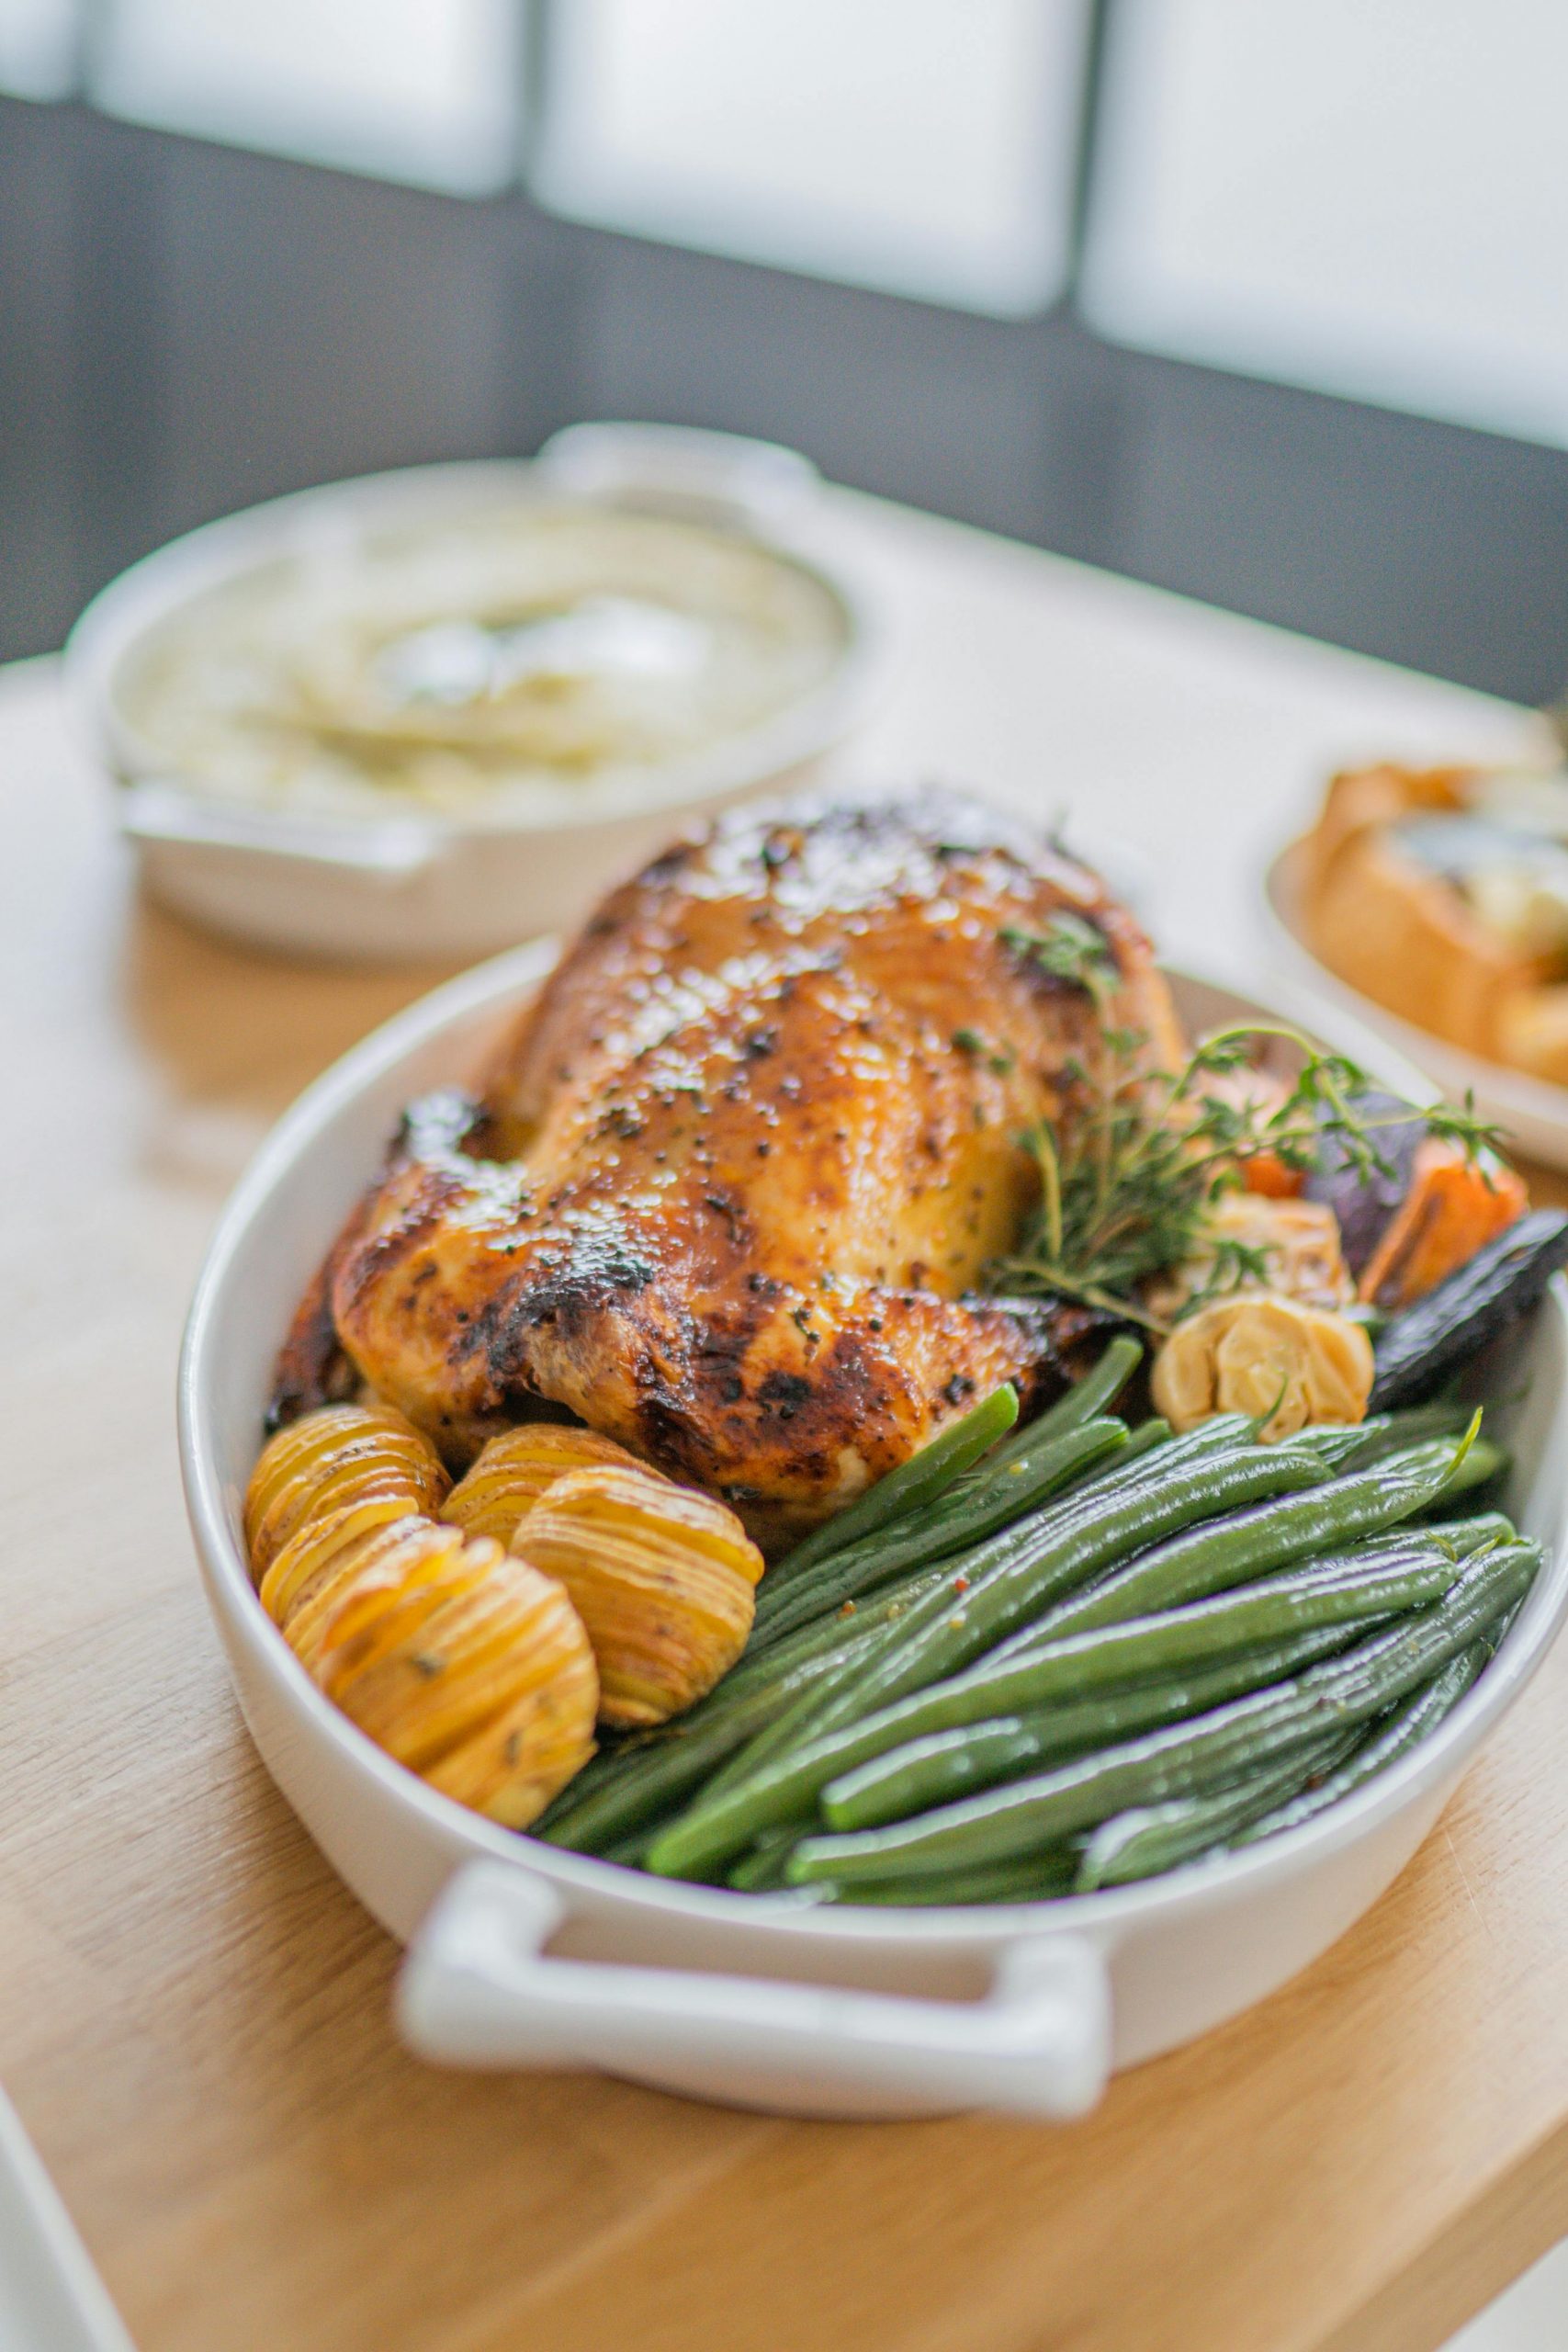
Also See: Winter roast chicken with lemon, oregano and crispy Greek potatoes
Winter roast chicken with lemon, oregano and crispy Greek potatoes


