
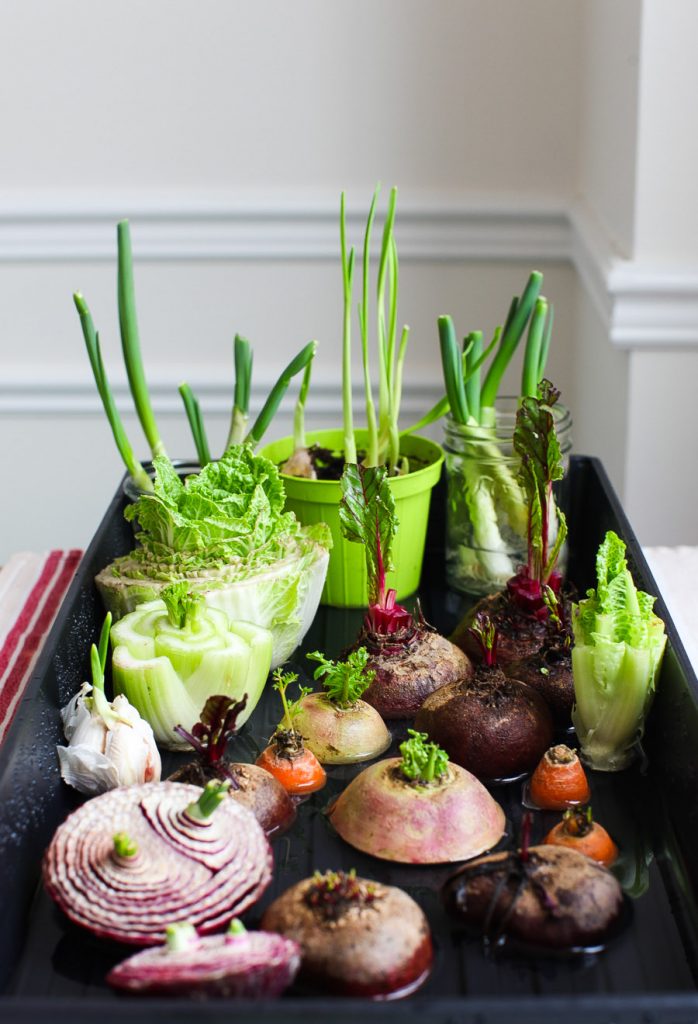
Scrap gardening 101
Windowsill gardening is perfect for lazy gardeners (like me) or anyone without an outdoor space. It’s also an easy way to eat fresher, nutrient-rich foods and reduce food waste. Yes, one less celery or spring onion makes a difference; every scrap counts. But hold off the urge to toss random scraps into a jar filled with water, not everything will regrow.
Here are a few guidelines to make your windowsill garden successful:
- Choose the right containers: You don’t need a special hydroponics system set up on your windowsill! Any old, clean container will do – think glass jars, plastic milk containers cut in half, or even soda bottles.
- Know when to use water vs soil: Use water for stems and root bases, and watch their roots regrow! Use soil for seeds or for transferring rooted scraps.
- Use viable scraps: Don’t use any old kitchen scraps. Make sure it has an intact stem or root base for veggies and herbs. Mash the fruits to get the seeds.
- Pick the right spot: Choose a windowsill that receives a lot of light or indirect sunlight. Direct sunlight may make the windowsill too hot, killing the scraps before they have a chance to thrive.
5 kitchen scraps you can regrow on your windowsill
1. Strawberries
One of the highlights of Summer, strawberries are one of the easiest fruits to regrow. The best part? They come with a container that you can upcycle into a planter. So before you chuck those sad, squishy strawberries, consider regrowing them.
- Slice thin layers of the outside of the strawberry and lay flat onto a plate with a sheet of kitchen paper. Place out on a warm, sunny windowsill until the seeds are dry.
- Gently rub off the seeds, collecting them on a plate or small bowl.
- Upcycle the strawberry container and fill it with compost.
- Sprinkle your collected seeds on top, mist with a spray bottle, and place on a warm, sunny windowsill. Mist every day to keep the soil wet. The seeds will sprout in 8 to 10 days.
- When the sprouts have grown proper leaves, you can transfer the plants to a bigger pot. Keep watering them each day and watch how the flowers turn into homegrown strawberries.
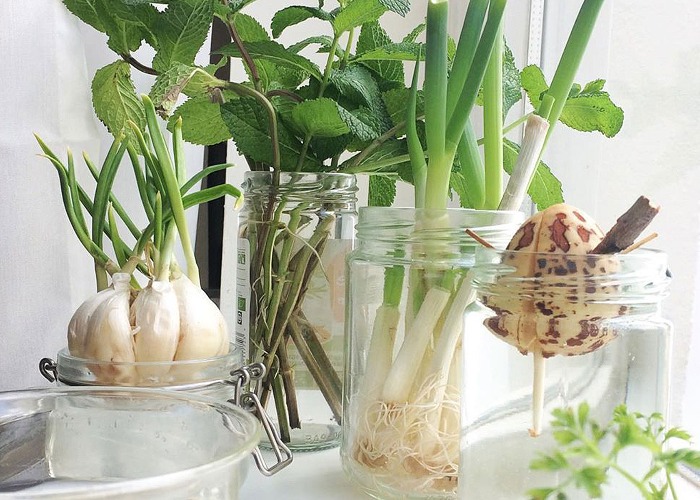
2. Spring onions
Spring onions are packed with punchy flavours and are so versatile. Grow a constant, fresh supply on your windowsill in just three steps. Remember to change out their water containers every second day or so.
- Trim the green section of the spring onion, leaving a 2 to 5cm base intact.
- Fill an upcycled container, like a glass jar, with water, about 2 to 4cm deep.
- Place your spring onion bases in the water, leaning them on the sides of the container to keep them upright. Leave to sprout and grow for a week or so, and start harvesting.
3. Basil
Can’t get enough of eating basil pesto or arrabiata pasta with basil? Grow your own supply in just three steps. Within two weeks, you’ll have little pots of fresh basil to make pastas, sandwiches, and salads with. In another month or so, you won’t be able to keep up with the supply!
- Use a basil stem that’s 8 to 12cm long. Leave four to six leaves at the top and strip the rest of the stem, removing all the leaves to make it bare.
- Place this into an upcycled container filled with about 4 to 6cm of water. Place on a warm, sunny windowsill. Change the water every other day.
- Watch as roots start to form. When the roots have grown to about 4cm in length, transfer the plant to a pot with soil. Water each day and start harvesting when the stems have doubled in size and grown 6 to 8 leaves.
4. Celery
Perfect as a crunchy snack or part of a flavourful base for risottos, stews, and soups, grow your own supply of celery. The next time you’re chopping away, keep the butt end (about 4cm thick) of the celery to one side.
- Rinse and place your celery base into a small upcycled container or bowl. Fill the container with warm water, enough to reach halfway up the celery base.
- Place on a warm, sunny windowsill and change the water every other day.
- In about a week, your base will have rooted, and you can transfer to a pot with soil. Water every day, celery is mostly water and needs to stay hydrated to thrive.
- Start harvesting once your celery has grown about 10 stalks. Leave a few stalks behind for your celery plant to produce more throughout the season.
5. Lemongrass
Lemongrass is such a versatile ingredient used to make flavourful teas and fragrant curry bases. One of the easiest ingredients to regrow, especially for the lazy gardener, all you’ll need is some patience, full lemongrass stems with their bottoms intact, and an upcycled container. You can grow your supply in water or choose to replant it into a pot with soil. Either way, as long as the plants have water, sun and warmth, they’ll thrive.
- Pop the lemongrass stems into an upcycled container and fill with about 5cm of water.
- Leave on a warm, sunny windowsill to root, which takes about two weeks.
- Once rooted, tape the sides of the container with black tape (you can even paint it) to give the roots some cover (they grow better in the dark).
- Harvest once the plant has doubled in size.
You don’t need a green thumb, just a few scraps, a sunny windowsill and a bit of curiosity. Every scrap you regrow not only reduces food waste but also provides your body with healthy, nutrient-rich fuel. Start with your favourite foods, then try your hand at regrowing rosemary, mint, ginger, garlic, lettuce, carrots, and even potatoes, beetroot, and onions.
Also See: How to grow your own supply of garlic
Feature image credit: Simplebites.net


