
Want not? Waste not! We leave no stone unturned and potential craft un-upcycled! Nestle your Easter treats in these pretty baskets woven from old paper gift bags.
By Sarah-Jane Williams
Photographs by Katelyn Allegra
What you need
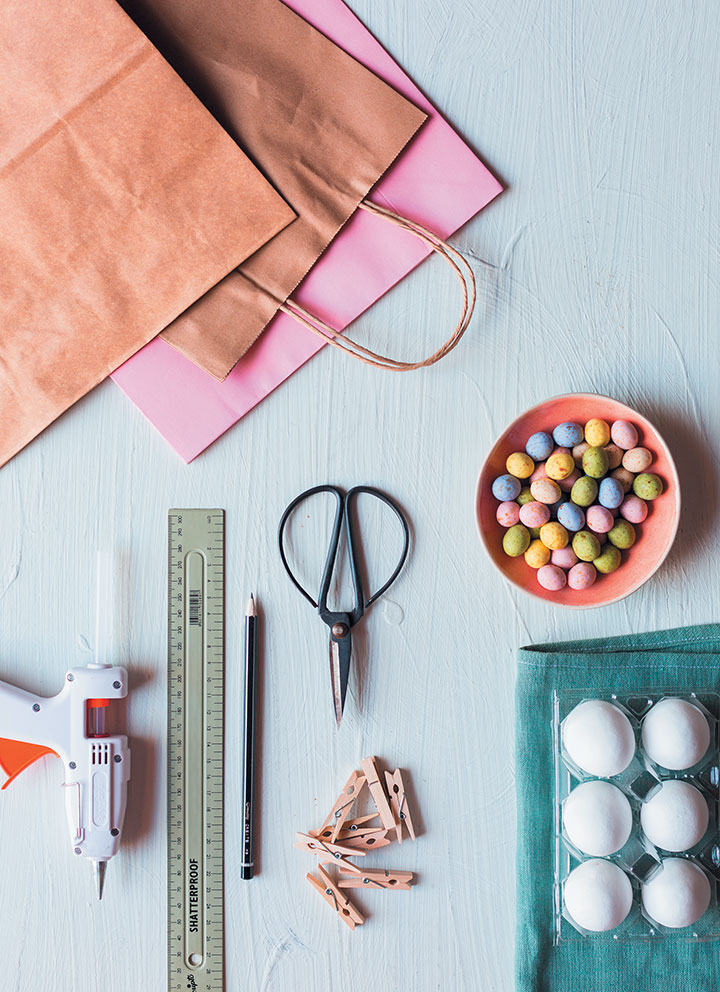
paper bag/gift bag (with stiff handles if you plan to use the bag’s handles for your basket handles)
scissors
tape measure
pencil
ruler
mini clothes pegs
hot glue gun
twigs, assorted greenery and
ribbons, to decorate
Easter eggs, to fill
STEP ONE
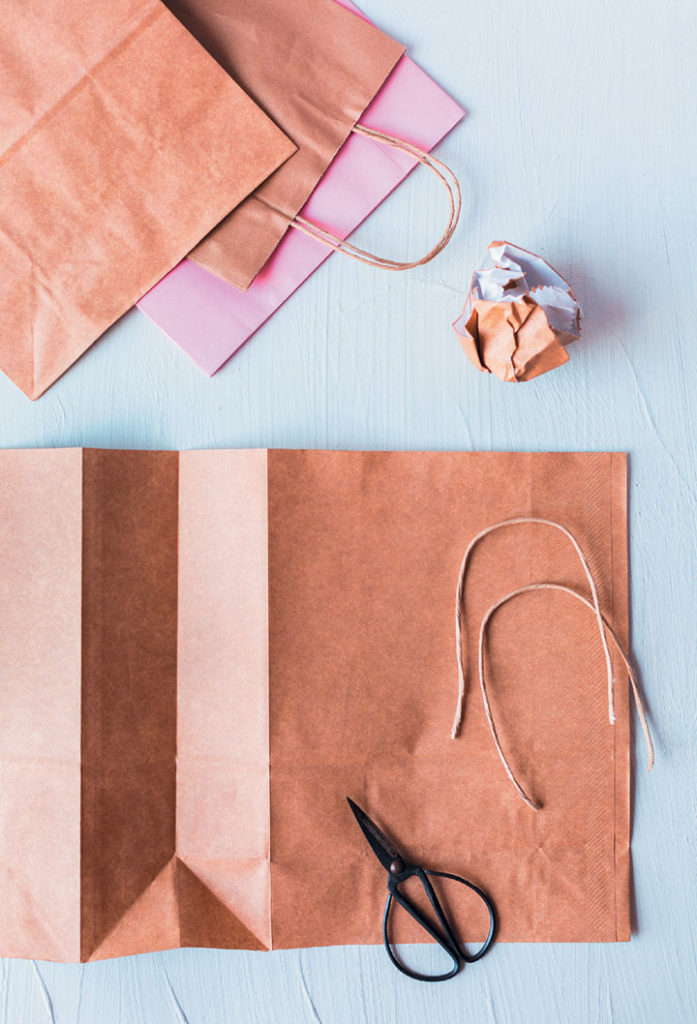
Cut vertically down one corner of the bag and fold it out flat on a work surface, removing the bottom section of the bag as well. If you’re using the handles of the paper bag/gift bag for your basket, detach and set the handles aside for later use.
STEP TWO
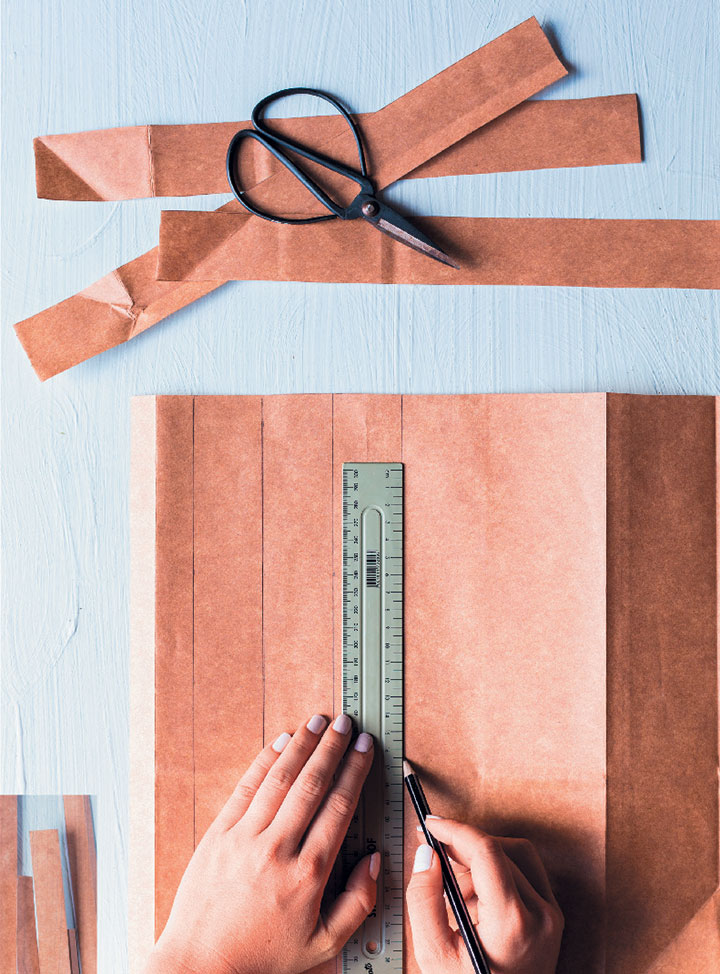
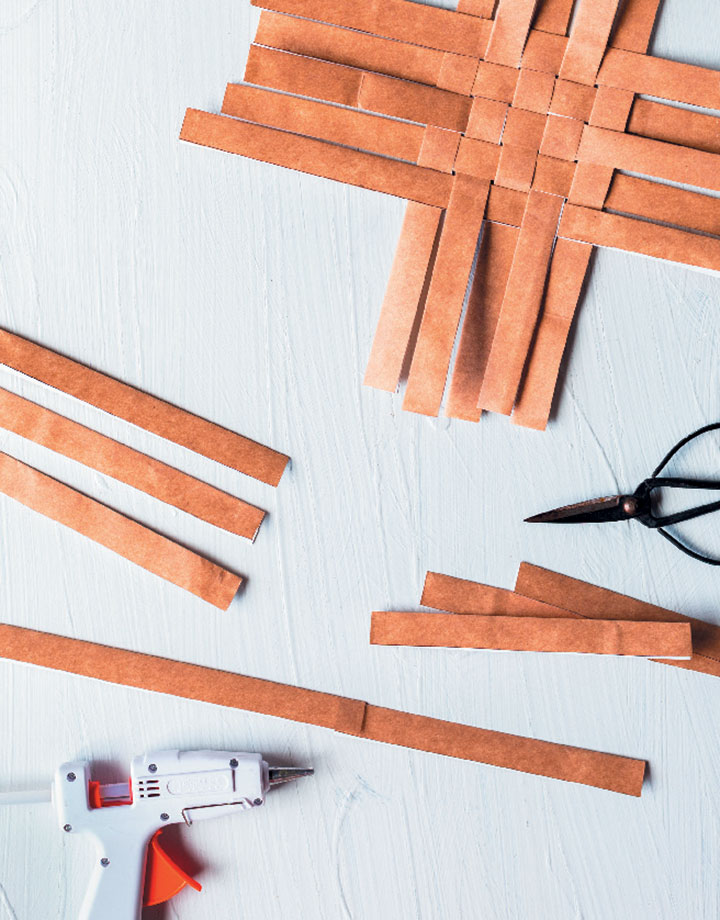
Measuring horizontally, find out the length of the bag and divide this number by 18, as you will need 18 strips to weave one basket – our bag was 80cm across, thus we had 18 strips of approximately 4cm. Use a pencil and ruler to draw these equal divisions vertically along the length of the bag and use these demarcations to cut out the strips.
STEP THREE

Fold all of the strips in half lengthways.
STEP FOUR
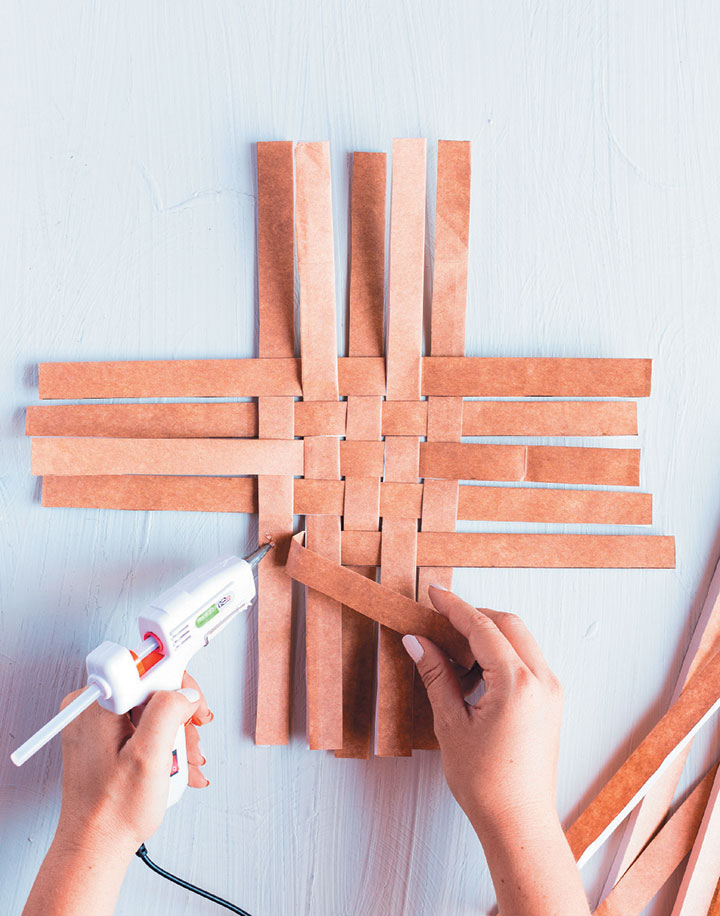
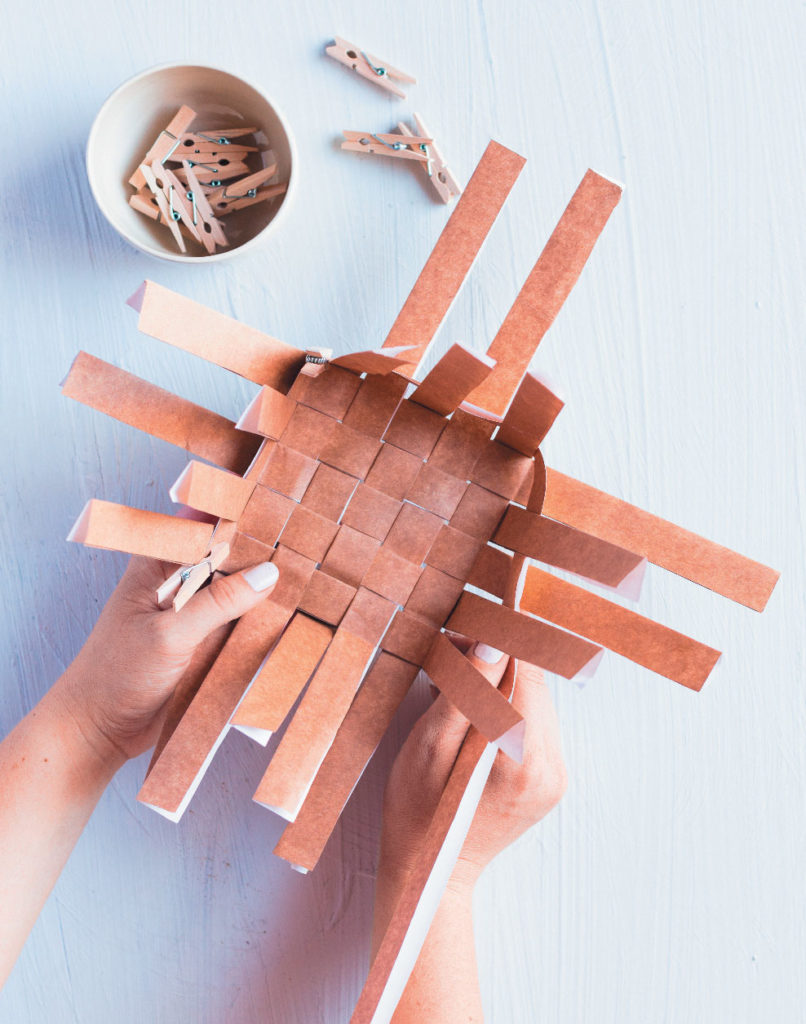
Using 10 strips, cross-weave them (5 horizontally and 5 vertically) through each other in the centre to form your basket base – our base measured 10cm square. Make sure the strips are tightly woven to create a more secure base. If necessary, peg the corners to keep the strips intact and glue them using a hot glue gun.
STEP FIVE
For the sides of the basket, take 4 strips and set them aside. Take another 2 strips, fold and cut them in half lengthways. Glue each of the shorter strip ends to the ends of each of the 4 strips to lengthen them for weaving around the basket sides.
STEP SIX
Fold the side strips of your woven base up to prepare to weave the basket “walls”. Take one of the long weaving strips and position this strip horizontally at one of the bottom corners of the basket. Peg this strip to the corner and glue it to the inner side of the basket. Weave the strip in and out around all 4 sides of the basket to start building the side wall. Trim as required.
STEP SEVEN
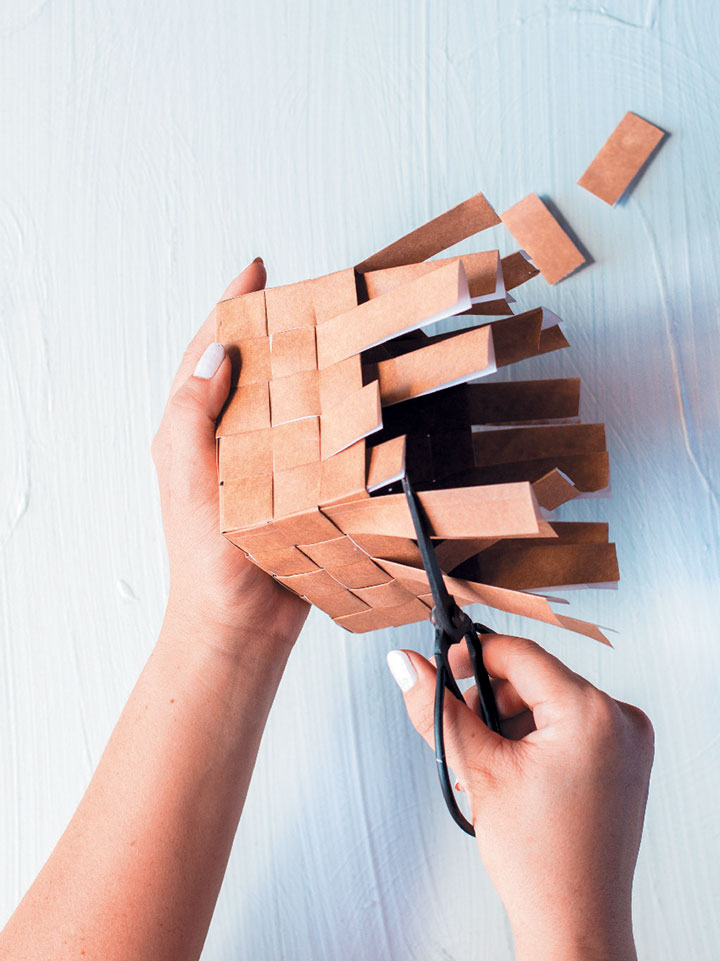
Repeat step six, weaving another 2 longer strips around the basket sides, each above the other and glueing at the corners to secure in place. The sides should now have 3 woven strips secured. Trim the top strip ends down to 1cm each.
STEP EIGHT
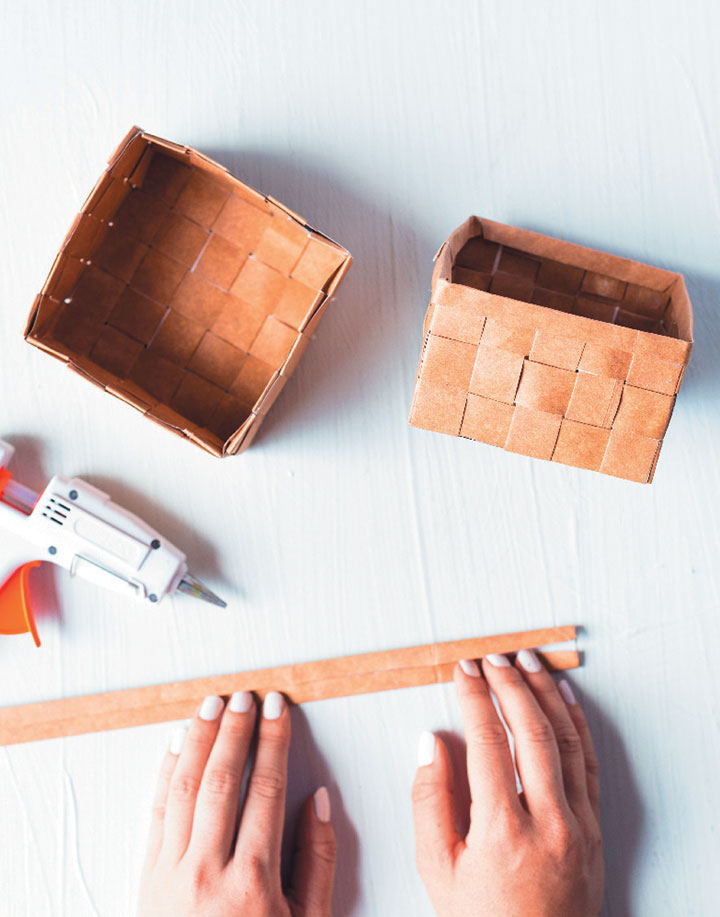
Fold and tuck in the top cut ends of the basket to neaten. To create the top rim, use the last remaining longer strip and fold it in half again lengthways. Glue this around the top of the basket, folding the strip over on both the inner and outer sides to neaten the top edge. Trim as required. (The sides of our basket were 6cm high.)
STEP NINE
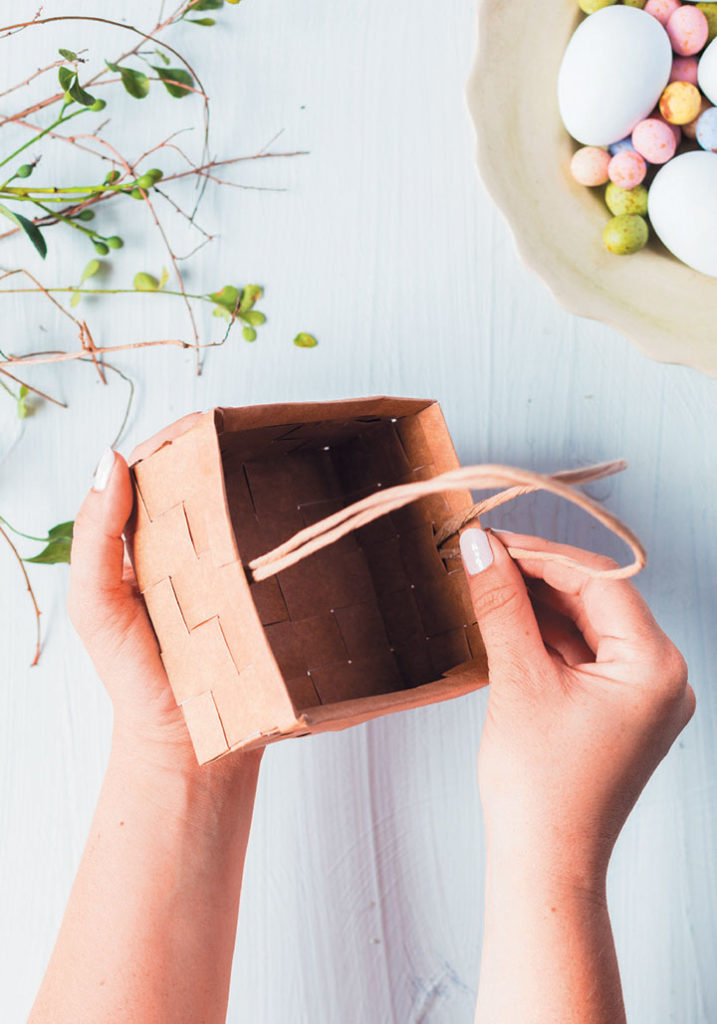
If using the paper-bag/gift-bag handles, glue and secure the ends of these handles to the inside of the basket. Alternatively, use the remaining strips as handles and glue the ends of the strips to the inside of the basket.

Imka Webb is a freelance digital marketing expert and the digital editor of Food & Home Entertaining magazine. www.imkawebb.com