
While it may seem like a straightforward process, achieving that perfect, cloud-like foam when whipping egg whites requires attention to detail and a bit of know-how.
With the right equipment, fresh eggs, and a proper technique, you can whip up egg whites that are white, fluffy, and dreamy—a must for various delightful recipes.
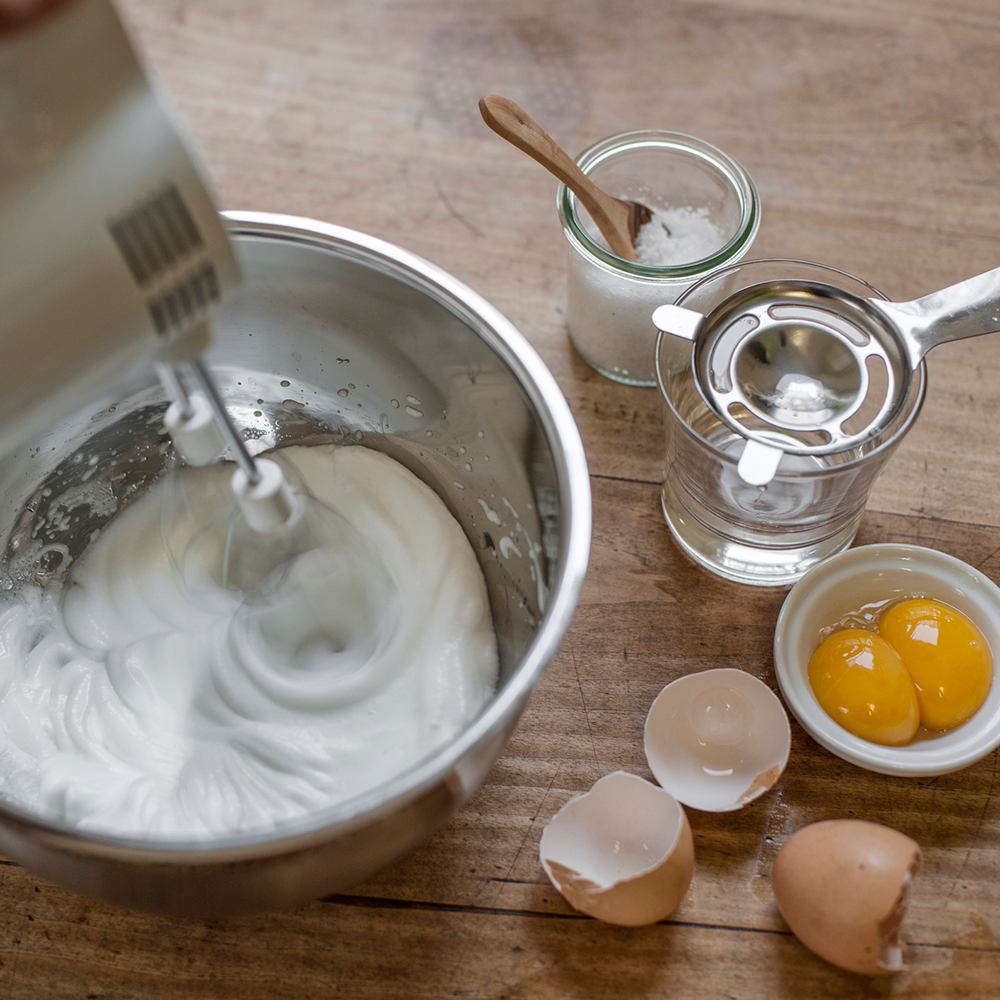
Essential equipment
It’s important to ensure you have the right equipment for whipping egg whites. Opt for glass, metal, or glazed ceramic bowls, as plastic bowls may hinder the whipping process due to their thin, oily residue. Additionally, make sure your whisk or beaters are impeccably clean and completely dry to promote optimal egg white volume.
The egg factor
Choosing the right eggs is crucial for achieving the fullest volume and stability in your egg white foam. Fresh eggs, with their slight acidity, are ideal for stabilising proteins. To determine freshness, conduct a quick water test—eggs that rest at the bottom of a water glass are freshest.

While room temperature eggs whip up more easily, separating cold eggs is simpler. To strike a balance, separate the eggs while cold, then allow the whites to reach room temperature before whipping. Remember, even a tiny bit of yolk in the whites can sabotage your efforts, so separate with care.
ALSO READ: A cooking time guide for the perfect boiled eggs
The whipping process
- Make sure your bowl and beaters/balloon whisk are really clean. Even a tiny bit of leftover stuff like egg yolks, butter, or oil can mess up your egg whites. Wash and dry them well, and you can even wipe them with a kitchen cloth dipped in vinegar or lemon juice to be extra sure there’s no residue.
- Now, it’s time to separate the eggs. Be careful not to let any yolks sneak into the bowl. Save those yolks for another recipe! If any yolk gets into the whites, you’ll need to start over.
- Start whisking the egg whites with a hand mixer on low speed or a balloon whisk. Keep going until you see small bubbles and the mix is mostly clear. Then, if you’re using a mixture, crank up the speed to medium (or the highest medium-high speed) until the egg whites double in volume, turning white and a little see-through.
- Check the peaks regularly to see if they’re just right. To check, dip a whisk or beater into the whipped egg whites and hold it horizontally. If the whites form a peak that droops a bit, you’ve got SOFT peaks. If the peak stays pointy and holds its shape, even when you spin the whisk, you’ve reached the STIFF peak stage.
Stages of whipped egg whites
Understanding the different stages of whipped egg whites is crucial to achieving the perfect consistency for your recipe.
- Foamy: At this initial stage, the egg whites are still mostly liquid, with a few bubbles making them slightly opaque.
- Soft Peaks: The egg whites transform into a white, stable form that holds its shape in the bowl. Lift the beaters or whisk, and soft peaks that slump over to the side will form.
- Firm Peaks: At the final stage, the peaks stand erect and do not bend over when the beaters or whisk are lifted. This indicates that the egg whites have reached their fullest volume and should not be beaten any longer.
- Avoid over-beating: Be cautious not to over-beat your egg whites, as this can lead to the breakdown of protein matrices and a collapsed foam. Over-beaten egg whites appear grainy, watery, and flat—there’s no salvaging them, so it’s best to start anew.
ALSO SEE: How to test if your eggs are fresh